Responsive Ad Slot

Tech

PHOTOGRAPHY

Games

Tech

Showing posts with label Photography. Show all posts

Surabaya Photo Festival 2015

Posted on Tuesday, 17 February 2015 with No comments


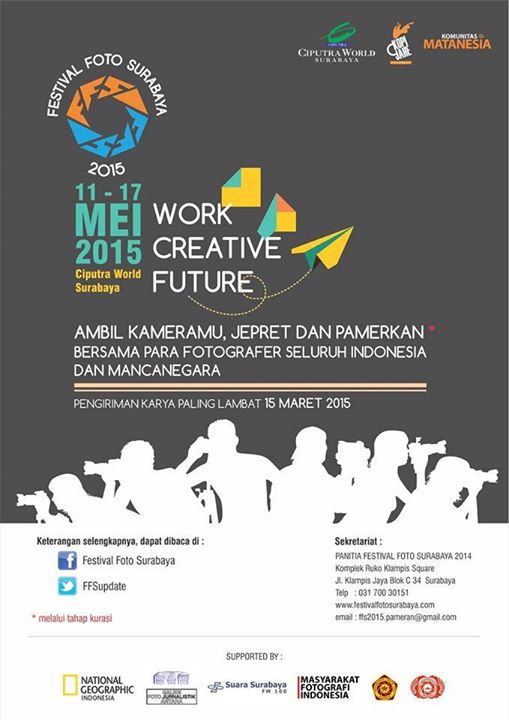
Surabaya Photo Festival 2015

Ciputra World Surabaya 11-17 May 2015


Work, Creative, Future (Work, Creative & Future)


Indonesia, the human resources (HR) and all its natural resources into capital to the viability of this nation to move forward. Abundant human resources from the village to the town should also be a major pillar for the success of development. With a population of over 200 million people, where it is about 80 million people are teenagers and young adults who could potentially be a future community.
Working hard in all areas with high creativity become contributing community and build and promote civilization and the world.
Photography as a means of communication, could presumably be a campaign to blow morale, creative and future for the wider community.

Festival Photos Surabaya (FFS) 2015 is a container appreciation for the world of photography in the country.

Born and held in Surabaya, FFS was initiated on the basis of the importance of space and time for the offender photography and cross-genre community to exchange ideas in the context of visual works.

Community Matanesia and Coffee Ginger Photo Community as the originator of the FFS seeks to establish networks in Surabaya and surrounding communities to work together to grow and dialogue in containers appreciation of photography.

The festival will be held on 11 to 17 May 2015
held at the Atrium of Ciputra World - Surabaya.

Founded by Matanesia Community and Kopi Jahe Photo Community, Festival Photo Surabaya (Surabaya Photo Festival) is a platform for photography appreciation in Indonesia. The importance for photographers from different genres to have space and time to propose and exchange their ideas through visual works was the motivation to made the festival into realization. The importance of photography development also played a great role in the formation of the festival. It is why Festival Foto Surabaya also serves as a network for photography communities to have dialogues as they are paramount to the development of photography in Indonesia.

In 2014, Festival Foto Surabaya took place for the first time in Surabaya. The second edition of the festival will be held at Atrium Utama Ciputra World Surabaya from 11 until 17 May 2015.

Beside photography exhibition, various programs will also take place during the festival. Those are photography seminars, talk shows, workshops, photo hunting, photobooks presentation, and photographic equipment exhibition and promotion.

READ MORE

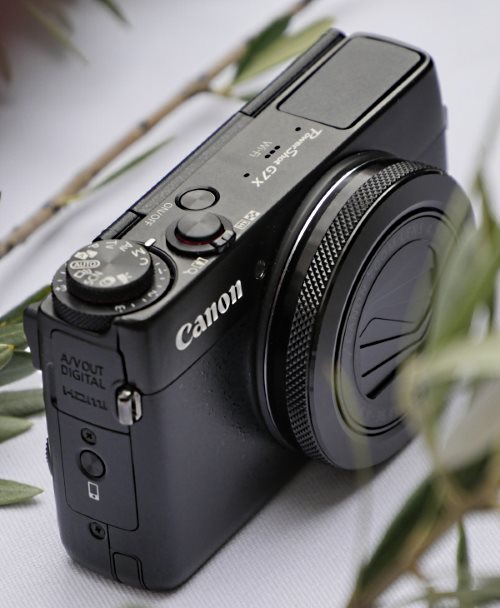
Canon PowerShot G7X review

Posted on Sunday, 15 February 2015 with No comments


Canon releases some pretty badass digital cameras, in my opinion at least. The Canon 5D, 7D and their many versions, are up there with the best digital cameras in the world, perfect for both personal and professional photography.

These cameras can be out of reach for those with shallow pockets though or those not requiring high-end specs, and so Canon has been making some affordable digital cameras too.

For weeks now, I have been getting acquainted with the sexy Canon PowerShot G7X, and I’ve loved every minute.

Looking at all the cameras that Canon has produced, this is perhaps the company’s smallest range, after the PowerShot S series. It slots into pants and shirt pocket and disappears.

It sits on a palm and disappears with its lens telescopically shrinking and only expanding when the camera is on. Though the camera is a little heavy, it wins because it is small in size. It weighs 304g (about half the weight of a tablet, or double that of a smartphone) with the battery inside and measures in at 103 x 60 x 40 mm.


With an ISO range that reaches up to 12 800, records video at 1080p/60 fps, A/V, digital USB data port, Micro HDMI port for displays, built-in Wi-Fi and NFC capabilities, RAW and RAW+JPG shooting, and manual exposure modes, this camera is best poised to compete out of its compact camera category. It really is jam-packed with features.

The camera snaps some incredibly deep images, rich and full of colour. Its depth of field awareness is also very good. Its intuitive feel is also an advantage, as many small cameras are not user friendly at all.

The Canon PowerShot G7X’s sports four buttons that sit around the four-way controller, situated next to the 3.0-inch LCD screen. Above the four-way controller are the ring function dial and a video record dial. All of these nestled to the side of the LCD screen and underneath a tiny thumb grip which helps for single-handed shots. The playback and menu dials are beneath the four-way controller.

The LCD, which I must admit, messes up the camera’s distant Leica M front, I would have rather preferred it without the LCD screen or an option between it and a viewfinder, is mounted on a hinge that is on top of the camera and it swings upwards 180 degrees lifts up until above the camera. This allows for maximum and efficient selfies and video diaries. I cannot be bothered with either so this was completely useless to me until I wanted to take some creative shots.

The four-way controller also offers controls for flash (which works only if the pop out flash has been released), Wi-Fi, and focus mode.

On top of the camera, the mode dial sits on top of the exposure compensation dial that can be toggled for exposure, and both dials have the diamond-knurled on the outside.

The shooting options are the usual, Automatic, Portrait, Manual, etcetera. I usually shoot on manual, and its easy to set this camera to do what you want. For those who enjoy the preset modes, they do an adequate job too for quick-fire snapping. When I did use the automatic mode, the camera handled the light well, compensating well for the dark areas by impressively crushing down the over exposed areas.
However, the camera also features two nifty options, one called creative shot, which shoots multiple photos and then previews them with different effects and another dubbed “Hybrid Auto”, which records sound after taking the image and then mix the two together into an image with sound for preview.

There are two zoom options on the camera too: one fitted against the camera, on the back of the lens and the other, is the old school gentle hold of the shutter button. At the base of the camera you’ll find the battery, card compartment release and a base plate.

All nubs and knobs, including the rings, zoom wheel, aperture scroll, and the base of the LCD and the battery/card release are great to grip and runs ones finger whilst waiting for the subject to move into the right spot for a photograph as they all have the same diamond knurling

A nifty flash sits within the body of the camera shoots when needed with a push down on the button on the side.

So how much is it all? Well, the Canon PowerShot G7X sells for around R7000 in South Africa. It’s not cheap, but it’s not out of bounds expensive either.
READ MORE

Props Are Evil: How To Use Them For Good

Posted on Friday, 23 January 2015 with No comments

Props Are Evil: How To Use Them For GoodNothing freaks me out like props. Every time I see a picture of flower girls holding an empty frame that is outlining a bride and groom kissing in the distance, I die a little inside.

Whenever I am subjected to a photo that attempts to bring in a letter jacket and a football and a casual I’m-just-hanging-out-here-in-my-letter-jacket-holding-my-football expression, I try to remember that I am terrible at making coffee and therefore cannot give-up photography immediately and go get an application at Starbucks. We have come to a place where portrait photography trends are natural and candid and while you would think that means we are leaving all props behind to die a formal, posed, and staged death, we just can’t help ourselves from wanting to put a little extra something in there.

Something personal. Or themed. Or fun. As a photographer, the logistics of getting something personal or themed or fun in an image and having it look natural are overwhelmingly complicated. Often leading to overwhelmingly complicated images. But if done right, a little extra something adds…….a little extra something. Photographing people with props comes down to one basic thing: how can you make this interact with that?
Make it Natural

This shot doesn’t scream A PROP WAS USED HERE, though it was. This bride did not provide me with a “must have” shot list, which of course makes her my favorite bride ever, but she had one simple request: one picture of her drinking a can of PBR in her wedding gown.

Now admittedly when she told me that, I wanted to pass out from the biggest eye roll that has ever happened because……….how on earth was I going to pull that off? The goal was a tongue-in-cheek stylish effort that didn’t come across as a classless snapshot.

Had there been any posing or obvious mention of the can, it could have easily gone from sweet and funny to tasteless and tacky. Instead it’s a near romantic take on a candid moment at a reception. It’s rare that making a joke out of the prop or drawing obvious attention to it generates a beautiful and interesting portrait. Since it’s already on the losing side of “one of these things is not like the other”, there is no need to point it out.

Make it Different

When it comes to props in portrait photography, chances are good that it’s been done before. So do it different. Photography is just storytelling and a prop is just another subject in your cast of characters; how many lines it gets is totally up to you. High school seniors tend to be the group most interested in including a prop. Which is often sports equipment and getting creative and unposed with things like sporting equipment is not an easy task. Step out of the intended purpose and treat it like an object.

A soccer ball doesn’t have to go at the feet, a letter jacket doesn’t have to be worn, a lacrosse stick doesn’t have to……do whatever it is that lacrosse sticks do. The image is about a person—the viewer knows what the intended purpose is of a practical use prop.

Make it Simple

Including a prop adds another level for the eye to process, so clean up everything else as much as you can. A tight frame, a clean background, and minimal distractions are all your friends. Stick with them and they won’t do you wrong.

Make it Meaningful

As props go, the easiest of the bunch are the ones people want included because they are highly personal and mean a great deal. Wedding rings, special stuffed animals, maybe their cat (tip: avoid this one if you can). The interaction here will be easier, so the key is highlighting the connection between the person and their special prop.

The book in this photo was written by their great-grandmother and has obvious family importance. Before this shot I took dozens of them just holding the book, wanting badly to document the entire cover. Finally it dawned on me that the the story here was about kids having something so significantly personal and historic still able to generate their interest. Great images are never about the prop, but the people it connects to and why.

Make it Timeless

Props have a way of dating a photograph. Take a moment to consider what the image you are about to take will feel like in 10 years. Or 20. Or 50. If there is anything that can be changed, deleted, or moved so that in a decade this image will have every bit as much relevance as it has today, do it.
These kids had on screen print t-shirts featuring cartoon characters that most of us likely won’t know in a few years. T-shirts, messy faces, lollipops, and two boys makes for a complicated snapshot. Colorful props, interaction, and sweet expressions makes for a timeless portrait.

Make it make Sense

In my opinion, there is no tougher prop than a costume. And when these sweet girls showed up in tutus at a suburban park, I had no idea how PINK TUTUS and grass and dirt were going to mix together. Seemed a little like onion flavored ice cream. If you take it apart piece by piece, it’s easier to vision it as a whole.

I knew I wanted to show off the tutus full glory so the girls had to be standing. I wanted the relationship of the sisters to play a huge role. And I wanted it to have a feeling of magic. Much like how I feel when I go to the park in my own pink tutu.

With enough creativity, almost any prop can make an image fun, personal, and interesting. Unless someone shows up with their cat and lacrosse stick. Then you’re on your own.
READ MORE

9 Nude Photography Tips

Posted on with No comments


Warning: Lets start this tutorial with a warning. This post is about Nude Photography and does cover a topic that some may find offensive. We’ve only included one very tame image and the post is (in my opinion) very tastefully written by a woman (one of our forum members who wishes to remain anonymous) who shares her experience and some lessons learned while photographing a friend.

If you think you’ll be offended by this post we do invite you to skip this post. This is a topic many of our readers are interested in so we feel it is relevant but do understand that it is not everyone’s cup of tea.


9 Nude Photography Tips

Let me start by saying that I never thought I’d do any nude photography – not because I am against it as a form of Art – but partly because it never seriously crossed my mind as something I’d do and partly because I never thought I’d come across anyone who would pose for me.

However recently a long term friend asked me if I’d be interested of taking some nude photos of her for her husband.

At first I thought she was joking but she was quite serious. They’ve been married for 10 years and she wanted some tasteful shots – nothing too risque or explicit – that she could give to celebrate their anniversary. She wanted someone that she could trust and someone who she thought could take a decent shot.

After attempting to convincing her that perhaps I wasn’t a good enough photographer for the job – I eventually agreed. We set up a time for the shoot at my home and I set up a simple make shift home studio. Below are some of the lessons that I learned from the experience.

1. Know what you’re looking for before you start shooting – 
what ended up happening with us is that when my friend arrived for the shoot and we started taking photos we quickly realized that we didn’t really have too many clues when it comes to posing for these types of shots. The first shots I took were quite bad and we quickly realized that we (or I) were not prepared. We decided to take a break and I pulled out a few of my photography magazines and books where I knew there would be examples of some poses that we could aim for.

We chose a pose that we wanted to start with – a shot of her standing with her back to the camera – the focus being her back – lit from the side to accentuate her curves. We saw this ‘classic’ nude shot in a couple of different books and thought it’d be a good place to start. Knowing what we wanted to achieve in this shot helped a lot. Taking nude shots is not as simple as grabbing a camera and getting your gear off – it helps to know what shot you’re attempting to get.

2. Try Black and While – 
at the start of our shoot we were shooting in color. The results were quite confronting to my model. She is a beautiful woman but even the best of us have a few blemishes or blotches on our skin that can be quite eye catching in shots. I had been intending to shoot in color and convert the images to black and white later but on seeing her reaction to the shots I’d taken decided to shoot in Black and White.

In doing so I noticed that the shots completely changed in their look and feel. They became less about the body in the shots and more about the shapes, the light, the shadows etc.

3. Warm up the Room – 
ok, so a practical tip and perhaps an obvious one. Make sure the heating is on! I actually didn’t notice the coolness of the room (I had my clothes on after all and perhaps had a bit of adrenaline at the thought of messing up the shoot) but my friend certainly did. It’s hard to pose and look relaxed when you’re shivering!

4. Use Longer Focal Lengths – 
this will probably vary from person to person but we found that things worked best when I shot with longer focal lengths. Perhaps it was partly that I wasn’t up real close and personal as I took my shots and this allowed my subject some personal space – but the shots when I used a longer lens were better than those when shooting with short ones. I had started off shooting with a 50mm lens but ended up using a Canon 85mm prime lens that I’d borrowed from a friend for most of the shoot and was very happy with the shots.

I also had a 70-200mm lens which came in handy towards the end of the shoot when we did some shots that focused upon taking some more close up shots of parts of her body – almost abstract type shots.

5. Anonymity Helps –
 another thing that we discovered as we went along is that the shots where my friend’s face was turned away from the camera were somehow more photogenic than those in which she was looking at the camera. Again it wasn’t that she’s not attractive or that she was uncomfortable with the situation – but something about seeing her face proved to be a little distracting in the images. Not seeing her face on the other hand added a little mystery into the shots. I’m not quite sure how to describe it any other way but the images also became a little less confronting.

6. Keep the mood relaxed and fun –
 I had the advantage of being friends with my subject and being a woman myself put her at ease more than if I were a male – however even with those two advantages it was a somewhat never wracking experience for both of us. Being naked in front of another person and being that other person can be quite confronting – although it can also be quite funny if you let it be. We took the ‘funny’ approach and spent a lot of the time giggling like school girls and I think it helped us move beyond the initial awkward stage.

I also had a couple of sheets and blankets handy so that between shots my friend was able to coverup and keep warm. We also used them to keep her covered when we were taking some of the close up shots later on where they couldn’t be seen.

7. My Home Studio – 
we used a couple of setups that worked well. One was with black material behind the model and a couple of spot lights lighting her from the side. We did this with the first shot that I mentioned above and it left us with the effect of her standing in front of a dark background. The other shot was her sitting on a chair that we covered with a white sheet. This we lit with natural light from a great window in my home.

My main advice is to keep it simple when it comes to your set up. You don’t really want your subject standing around while you adjust settings and get things set up – you want him or her to be relaxed and not put out by the experience.

8. Simple Poses – 
I wish I could show some of the shots we took (by my friend would be horrified with that as they were shots just for her husband and her and not the masses here at DPS) but the best shots were very very simple shots.

I’m not sure if this helps but I found that when I stopped treating my friend as a person wanting a portrait and started looking for shapes and considering how light was falling on her body (almost more like a landscape) that I started to get the best results. As a result I had her stand, sit and lay in comfortable positions and found myself moving around her more than having her move around me.

9. Cover Up – 
another lesson that we discovered over the morning that we shot was that sometimes less skin is more. We tried a few shots where my subject covered herself up in a number of ways – either by using her hands and arms to cover her torso or where she even at one point wore an unbuttoned shirt.

As it turned out some of these were her husbands favorites.

Over all the experience of photographing a naked person was one that was a great learning experience. I’m not sure that it will ever be something that I’ll do again (although my friend wants to do it again for their 20th anniversary) however it was one that taught me a lot. I am sure many other DPS readers have experiences that they could add to this in comments below – I’m looking forward to learning more from you.
READ MORE

Top 12 Macro Photography Tips

Posted on with No comments


Close-up macro photography is great for really bringing out the detail of your subject. Colin Varndell offers 12 creative macro photography tips


It may seem daunting at first, but macro photography really isn’t so different from other kinds once you get a graps of the basics. Pro photographer Colin Varndell offers his top 12 macro photography tips…
1. Choose the Best Lens

The focal length of macro lenses ranges from 50mm to 200mm. Although many zoom lenses boast a macro setting, these are usually less than half life-size magnification – true macro, however, begins with 1:1 and nothing less.

A 50-60mm lens is suitable for general macro work but if you want greater subject-to-lens distance a 100mm lens will give you this at a price.

For creatures like butterflies and dragonflies, lens-to-subject distance becomes even more important so focal length needs to be greater.

The 150-200mm range is the most expensive, but you will appreciate the extra power when stalking flighty subjects like this Gatekeeper butterfly.
2. Make a Standard Zoom Focus Closer by Adding Tubes
Extension tubes fit between the rear mount of the lens and the camera body to make the lens focus closer and therefore produce a much bigger image of a small subject.

This image of a thick-legged flower beetle was shot with an 18-200mm zoom lens and a 20mm extension tube added. This is a much cheaper alternative than buying a macro lens but tubes are more fiddly to use in the field.

Also, with an extension tube fitted you lose the infinity end of your focusing range. Add more tubes and this becomes increasingly more limited.

3. Add a Dioptre to Make a Lens Focus Closer

Close-up filters are single-element lenses that look like magnifying glasses.

These filters screw into the front element thread and can provide an inexpensive alternative to splashing out on a pukka macro lens.

They come in a variety of strengths that are measured in dioptres.

Close-up filters are often available in sets of +1,+2 or +4 dioptre magnification.

Dioptres are also available to fit Cokin style square filter systems.

Add a dioptre to a bridge camera or a compact to achieve real close-up shots.

The golden ringed dragonfly shown here was shot on a Lumix FZ30 camera with a +3 dioptre added to the front element.
4. Use Apertures to Control Depth of Field

The left snowdrop shown here was shot at f/2.8 while the one on the right was taken at f/22

To get the most out of available depth of field, select a small aperture like f/16 or even f/22.

You will find that at half-life size the depth of field you can achieve at f/22 will be only around 15mm at best.

On the other hand you may wish to go to the other extreme and show as little sharpness as possible by opening up to full aperture like f/2.8 or f/4.

One advantage of the latter option is that any out-of-focus highlights will show as circle-like bubbles that can look very attractive.
5. Blend Flash with Ambient

With more static subjects it can be fun to add a blip of flash just to liven up an image.

In this composite shot of a sycamore leaf, both images were exposed for natural light; however, the bottom image was given a blip of off-camera fill-in flash and the shutter speed was increased by one stop in order to darken the background.

6. Use a ‘Third Hand’

A ‘third hand’ device is an essential macro photography accessory. It will enable you to support or position subjects just where you want them. In turn, it can also help to provide endless possibilities of positioning backgrounds.
7. Fine-tune Macro Pattern Compositions

Although we can crop things using software later, it is best to fine-tune composition in-camera at the time of shooting as much as possible.

With close-up pattern details, ensure they either fill the frame completely so that there are no gaps around the edges.

Alternatively show the entire pattern with space all around it.

These two shots of the same fungus illustrate how these opposite approaches look in practice
8. Point of Focus

It is imperative to consider the actual point of focus when working close-up with tiny subjects. You can dramatically change the appearance by where you chose to focus.

These two shots of the same teasle head were both shot at the same maximum aperture, but the point of focus was changed by a couple of millimetres to produce an entirely different effect.

9. Check LCD Panel

Use your rear LCD facility to ensure you have got the shot you want before moving on. Look carefully at the corners to make sure there are no intrusions.

Tidy up any unwanted debris in the scene and make sure that your composition concentrates on your subject as intended. It’s also wise to carry a spare battery, as constantly reviewing shots will drain power.

10. Raindrops

After rain can be an excellent time to search for macro subjects when everything is dripping with droplets of rain water.

Go in close to show how the raindrops act as miniature lenses, magnifying the veins in leaves.
11. Backgrounds

Add different coloured backgrounds to macro shots to change the look of the subject.

These four backgrounds were all natural subjects but shot deliberately out of focus. Grass was used, and tree foliage and a combination of bushes and sky.

12. Butterflies
With small but lively subjects like butterflies, it can be difficult getting close enough to them for frame-filling shots.

Try stalking them later in the day, just as they are about to settle down for the night.
READ MORE

Terminology and classification Camera Lens

Posted on with No comments

The lens is a major part of the camera arrangement comprising an optical element which serves to capture the image in front of the camera so that it can be accepted by the sensor or film. In compact cameras and prosumer cameras, the lens is made ​​into the camera body, but the lenses used in SLR cameras sold separately. Both lenses are fused with a special lens camera or SLR cameras, both have similarities in working principle, optical design and characteristics.

High quality lens has the ability to deliver satisfactory results in terms of sharpness, contrast and color. To assess the performance of the lens makers can use MTF charts describing the quality of the lens. Thanks to modern lens manufacturing technology with the help of computers, today more and more quality lens and is equipped with modern features such as a special coating that can improve the sharpness and reduce flare. In choosing a good lens, the necessary basic understanding will be terms which are common to the lens, as well as recognize the division or classification by type lens.

Focal Length (Focal Length)

In discussing about the lens, the first thing seen of a lens is the focal length of the lens. By definition, the focal length indicates how the distance between the sensor (or film) of the lens, while the camera focuses to infinity (infinity). To show the focal length of this lens is used millimeters (mm). In a more general understanding, lens focal length indicates how much the corners of the image (picture angle or the angle of view) that can be produced by a lens. Corner of the image is what will determine the extent of the image area can be obtained at a particular focal length. Note:
  • - Short Focal lens (eg 28mm) produces a great picture angle so as to obtain a wide image area or width (wide-angle). The shorter the focal then the vast area of the image that can be produced. Then the 18mm lens can be called more 'wide' than 28mm.
  • - Focal length lens (eg 200mm) resulted in a small corner of the image so as to obtain a narrow area of the image, suitable for long distance photos (telephoto). The longer the focal, the more distant telephoto capabilities possessed the lens. So a 400mm lens can be called more 'tele' of a 200mm lens.

The lens focal length is considered equal to the area of the image seen by the human eye (angle picture about 46 °) is 50mm, so the lens with a 50mm focal commonly referred to as a normal lens. Focal lens with a smaller than 50mm wide lens called, objects are photographed with a wide lens result will look much further than the reality. Lens with a focal greater than 50mm is called a telephoto lens, the object photographed with a telephoto lens results will appear closer than it should.

So based on the focal length, at least we know the three types of lenses are lenses wide, normal and telephoto lenses. Wide lens suitable to get a photo with the widespread impression, such as scenery or architecture. While the telephoto lens is suitable for photographing distant objects such as when outdoor or sporting events covering the event. Normal lens itself is more suitable for facial portrait or other needs that require a normal picture angle.

Fix Lens and Zoom Lens

When viewed from the focal design, the lens can be classified into two main groups. The first is a fixed lens / prime (have a fixed focal length) and the second is a zoom lens / vario (have a focal length that can be changed).

Fixed lens has a small size, with a bit of an optical element and as the name implies, only fixed lens has a fixed focal length. Primes are available for a wide range of focal lengths ranging as:
  • - Fix wideangle lens (24mm, 35mm)
  • - Normal fixed lens (50mm, 60mm)
  • - Fix telephoto lens (85mm, 105mm)

The zoom lens itself has advantages over fixed lens that has a focal range that can be changed, from the shortest focal to the longest focal. Ability is measured by comparing the zoom lens focal longest to shortest focal, eg, a 28-280mm zoom lens, the focal length is 28mm shortest and longest focal is 280mm, so the lens is called with a 10x zoom lens (or 280 divided by 28). The zoom lens has advantages in terms of practicality because the lens can be obtained with a wide variety of focal lenses for a variety of photographic needs and desired perspective. But in terms of sharpness, the zoom lens is not able to match the fixed lens. This is due to the complexity of the optical arrangement of the zoom lens so that potentially reduce the sharpness in general. In the zoom lens, the focal sharpness longest and shortest focal generally decreased.

Lens opening (aperture)

In the camera lens there is a mechanical component called the aperture or diaphragm, which serves to adjust the amount of light entering the lens. The diaphragm is composed of a set of thin metal layer (blade) that form a circle and the iris aperture size can be enlarged or made ​​smaller. Setting the entry of light is done by changing the size of the aperture of the largest to the smallest openings in units of f-number. Large openings expressed in a small f-number, and vice versa small openings expressed in a large f-number. Lens with a large aperture has the ability to incorporate more light making it possible to use a higher shutter speed.

The picture above is the shape of the diaphragm of the lens, where the picture on the left shows the small openings and the right shows the large openings.

Large aperture (eg f / 1.4 or f / 1.8) is more easily realized in the fixed lens design. Then the majority of the fixed lens has a large aperture which also had the privilege to create an alias blur out-of-focus in the background. But not so with the zoom lens, in which to make a zoom lens with a large aperture a bit more difficult to do. In the zoom lens, maximum aperture common is f / 2.8, although there are now beginning to be found pocket camera has a lens that can open very big to f / 1.8.

Judging from its aperture design, the zoom lens itself is divided into two groups:
  • - Constant aperture zoom lens
  • - Variable aperture zoom lens

With a constant aperture zoom lens, for example, lens 24-70mm f / 2.8 or lens 70-200mm f / 4 maximum aperture lens indicates that this at any focal position is fixed. So for example the lens 24-70mm f / 2.8 will be able to open at f / 2.8 at 24mm to 70mm focal position. Such lenses are more difficult to make, also have a larger size and weight, so the lens of this type belong to the class of the zoom lens is expensive.

Variable aperture zoom lens with an easier and cheaper to produce, and has a smaller size so compact and lightweight. This type of lens has a maximum aperture that will shrink when the zoom lens at the shortest focal position to the longest focal. To determine the maximum aperture lens of this kind can be seen from the information that is written on the lens, such as lens 18-105mm f / 3.5-5.6 means this lens has a maximum aperture of f / 3.5 at 18mm focal position and maximum aperture will shrink up to f / 5.6 at 105mm focal position. Although not written in the lens, minimum aperture can actually shrink when the zoom lens. It depends on the design of the lens, the lens usually has a minimum aperture can shrink when the zoom lens is a lens SLR camera.

Due to the large aperture of a lens can incorporate more light making it possible to use a higher shutter speed, then the lens with large openings called with a fast lens. For a fixed lens, because generally large maximum aperture, then almost all primes called fast lenses. However, since it is difficult to make a zoom lens with a large aperture, the aperture zoom lens with constant f / 2.8 already can be called with a fast lens. Most SLR camera zoom lens which has a small size is a slow lens because it has small openings and will become smaller when the zoom lens.

Features Image Stabilizer

Some modern lens has now been equipped with image stabilizer feature that serves to dampen vibrations that occur when we take pictures. This feature adds an element lens special function to compensate for hand-shake is detected by the sensor, so that the risk can be reduced image blur. Own stabilizer function is required when the camera is used to take photos at a low shutter speeds or when using a telephoto lens.

When concluded, the classification of the lens can be arranged by:

Focal length:

* Wide Lens
* Normal Lens
* Telephoto lens

Lens Type:

* Lens fix / prime (fixed focal)
* Zoom lens / vario are subdivided into:
- Constant aperture zoom lens
- Variable aperture zoom lens

Design aperture lens:


* Fast lens (have large openings)
* Lens slow (have small openings)

Aside from the general classification as above, there are special lenses that are used for specific purposes, such as:

* Fish-eye lens for extreme picture angle (180 °)
* Macro lens for photographing objects very close (magnification 1: 1)
* Tilt and Shift lens for professional needs (control perspective)
READ MORE

Histogram Function In Digital Photography

Posted on with No comments

One term that is popular in the era of digital photography is the histogram. This term can be found on most modern digital cameras and the image processing program in the computer. Histogram itself is actually a representation of a digital image that is displayed in the form of graphs and can be displayed on the screen when the camera preview (record mode) or can be displayed on the captured image (playback mode). Histogram feature is important in evaluating the accuracy of exposure, but for that we need to understand the meaning of the graph shown by the histogram.

Little mention of exposure, there are two extreme conditions that can occur when the camera's exposure settings are not right. The first condition is called over-exposure where the image becomes too bright, there is a loss of detail in bright areas (termed blown highlights). The second condition is under-exposure, in which the image is too dark, and the detail in the dark areas become lost. The function of the histogram is telling us about how the exposure held by the pictures we took. Although digital cameras have an LCD screen is sharp and bright, but the LCD screen can not always be relied upon as an accurate reference exposure. Sometimes the images on the LCD screen looks bright, but it turns darker actual results depending on the type and settings on the camera LCD. Arguably the histogram on a digital camera into a modern light meter precision, where the graph shown represents the actual value of the dark light capable captured by the camera sensor.

Histogram in general looks like in the example image above. The graph above has a dark light range of 256 levels from 0 (minimum) to 255 (maximum), with the assumption that the camera sensor has a dynamic range of 8 bits. Each pixel of the sensor chip will catch the light with different light-dark and graphics that appear in the histogram shows the number of pixels for each level starting from the value 0 to 255. A value of 0 which is located at the far left of the histogram indicates the darkest conditions (pure black), in the center of the histogram is a middle-gray / midtone (gray) and the far right represents the most light conditions (pure white) with a value of 255. How to view the histogram is to see the spread of the graph on the horizontal plane (left and right) and also see the number of pixels in the vertical plane.

Consider the example above. Histogram in the above example is more dominant on the left so that the image is represented by a graph of this kind tend to be dark. Peaks also appear very high graphics indicate clipping or under exposure. There are some parts of the picture are losing detail in dark areas (shadows). When the display of this kind is found before the photo is taken (when the preview), then we can do the exposure compensation to a positive direction so that the peak of the graph can be shifted from dark areas.

The picture above shows the histogram graph dominant on the right so that the picture will be too bright. The peak of the graphic on the right side is also very high in the area indicate clipping highlights due to over exposure. When this condition is experienced as a preview, exposure compensation can be performed in the negative direction so that its spread could be in the middle.

The picture above shows the histogram which has a dark and bright areas are equally dominant, usually occurs when the dynamic range of the object to be photographed is much wider than the dynamic range of the camera. For example, when shooting a landscape dominated by bright sky and dark land.

So basically no histogram is considered 'true' or 'standard' because of the shape histogram will always vary depending on the condition of the image represents. But as a comparison, an image that has high contrast and detail and did not experience under or over exposure will have a graphical form that spreads from a dark area to a bright area with peaks that do not experience clipping. Use the information displayed by the histogram as a means of evaluating exposures and know is there is no clipping region of a photograph.
READ MORE

Image Stabilizer, the essential features of a digital camera

Posted on with No comments
 
 
One of the important features that affect the quality of the image is an image stabilizer or stabilizer gambar.Fungsi this feature is to dampen vibration (hand shake) when shooting the potential to make the images become blurry. Often without realizing it, our hands can not actually really solid in holding the camera.

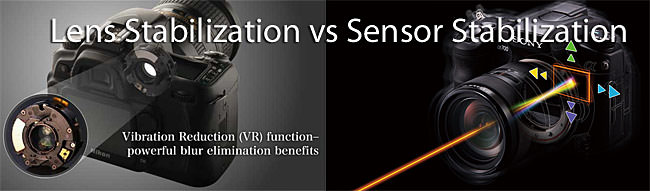
The working principle of this feature is to rely on a gyrosensor that detects camera shake and mechanically compensate for the vibration damping. The camera manufacturer adheres to two different versions of mechanical compensation, namely the principle of lens-shift (add the stabilizer on the lens elements) and sensor-shift (stabilizer incorporated in the sensor). Both although technically different, but the principle is the same.

System stabilizer of the most common is the stabilizer with lens-shift principle embedded in the lens. Most digital cameras and even digital SLR camera lens was put on this manifold stabilizer. In principle, the hand vibration detected by the sensor are processed digitally and stabilizer on the lens element to be moved in the opposite direction to the direction of hand tremors.

Different as lens-shift principle, the principle of the camera with a sensor-shift stabilizer system combined with the camera sensor itself. So the camera's sensor which embraces the principles of sensor-shift can move to compensate for hand-shake is detected. Most DSLR cameras like Pentax, Sony and Olympus implement this system so that the stabilizer feature can be used with any lens used.

Naming the image stabilizer feature can be different for each brand camera, although the principle is the same:

Canon : Image Stabilizer (IS), including the lens DSLRnya
Nikon : Vibration Reduction (VR), including the lens DSLRnya
Panasonic : Optical Image Stabilizer (OIS)
Pentax : Anti-Shake (AS)
Sony : Super Steady Shot (SSS)
Other brands : Use the generic name Image Stabilizer (IS)

While the third party lens manufacturers also began to provide stabilizer feature in some of their lenses as:

Tamron : Vibration Correction (VC)
Sigma : Optical Stabilizer (OS)

In conditions such as whether the stabilizer feature is very beneficial?

There are at least two conditions that require the presence of a stabilizer feature, namely a low speed when shooting wear and when to wear lenses with a focal length (telephoto). Indeed vibration when shooting hand does not always result in the images become blurry. Apaalaagi when using high shutter speed, vibration experienced by the camera does not affect anything because the time between the shutter button is pressed until the photo is taken only in the range of milliseconds. However, when using a low speed, for example, 1/20 sec or slower, vibration hands will begin to potentially interfere. Even when using a very low speed like 1 second, the use of stabilizer feature is no longer effective and it is necessary to use a tripod.

There is a classic guideline in photography where to produce images that avoid blur due to hand shake, use a shutter speed that is contrary to the position of the focal length used. So for example, we use a lens with a focal 300mm, then the required value of at least 1/300 second shutter speed to a safe outcome of a blur. In other words, when using a lower shutter speed of 1/300 sec then the images are at risk of blur. Compare when using wide angle lens with 30mm focal instance. According to the guidelines above, it is necessary to 1/30 second shutter speed so that the images are not blurry. In conclusion, the focal length of the lens blur due to hand shake potential greater.

How to prove that this stabilizer feature actually works according to his theory?

In principle, using stabilizer feature, we can take pictures with a lower shutter speed can be compared by using a camera without a stabilizer features. So to prove the performance of this feature is quite easy, by trying to shoot at low speed. Manufacturers usually claim that features homemade stabilizer able to work between 2 to 4 stops lower.

Examples of cases, for example when no stabilizer we can only shoot at the lowest speed 1/100 sec (if lower than the result will shake), then when the stabilizer we can use up to 1/20 sec speeds, it means that the effectiveness of the stabilizer feature around 2 stops lower.

Features stabilizer can be utilized to stabilize the hand-shake when recording video. Although not applicable to all digital cameras, but generally feature stabilizer function well when taking pictures or recording video. Without the stabilizer features, hand tremors can be seen when the recorded video is played back. Vibration will appear more severe when the focal length of the lens being used enough.

Tips to maximize the features stabilizer


Stabilizer feature is intended to help reduce vibration hand, while the results will vary depending on many factors. Here are the things that need to be considered to get the most out of this stabilizer feature:
  • Most people feel to have had a full-featured camera stabilizer, he can shoot with the condition of a moving hand. Whereas before photographing make sure the position of the body and has been silent and steady hand. This will facilitate the work stabilizer function.
  • Features stabilizer starts working when the shutter button is pressed half, and to achieve the best performance of this feature needs a little time. For that do not directly press the shutter button too quickly because there is a possibility of photos taken while this feature is not yet achieving the best results.
  • When shooting without a tripod, avoid wearing shutter speed is too low. The lower the shutter speed, the work will be heavier stabilizer. At very low speed stabilizer feature has no use, that's why it takes a tripod.
  • Because sometimes despite the stabilizer result is still too blurry, it helps to use a multi shot facility. For example, take three or four at once, and then select the best one. Thus opportunities medapat sharp photos even greater.
READ MORE

UNDERSTANDING THE PRINCIPLES OF AUTO FOCUS ON CAMERA

Posted on with No comments


Caution:

All contents of this document are the property of Intellectual Property (IP) copyright of Focus archipelago, is prohibited to copy or move into the form, format or media whatsoever without the prior written consent (written consent) from Focus archipelago.

The term means that the point of focus appropriate terminology gathering place through an optical light or lens. In photography, a focused image is obtained by placing a collection of light at the exact point being in a movie or on the sensor (called focal plane). When the dot is formed in front of or behind the focal plane, the resulting image becomes unfocused or out of focus.

The lens of the camera, like the human eye, should ideally be able to focus on objects that are close or far away with just as good. But there is the nearest boundary where the lens can lock the focus, while the farthest limits commonly referred to infinity (infinity). In camera lenses are optical elements that can move back and forth to adjust the distance to objects in front of him so that the fall of the beam direction can still be collected at the focal plane. Exceptions to the camera with fixed focus lens manifold, where no lens element that can move. Camera with fixed focus and use a small aperture wide angle lens that is simple to save on costs such as camera phones.

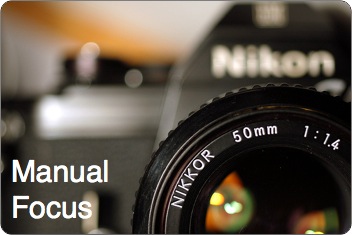
Once upon a time, the lens on the camera requires setting the focus manually. To focus, we have to rotate the focus ring on the lens and see the effect in the viewfinder to get the sharpest image according to our judgment. Fortunately, in the end found auto focus technology that allows us to take pictures. With auto focus, the camera automatically moves the lens elements to obtain the best results, in a fairly short time.

In modern cameras are digital, there are two differences in the working principle of auto focus depending on the type of camera. In a DSLR camera, auto focus is still the same principle as film SLR cameras using the principle of phase detection (phase detect) using a separate module. This system is more complicated, expensive but very accurate and fast. In addition to DSLR cameras such as compact cameras to the new format cameras such as the micro four thirds, the principle use contrast detection auto focus (contrast detect) is more cost-effective.

The principle of contrast detection is actually present in the digital age whose characteristics capable of displaying a preview of the image to be captured via the LCD screen. What appears on the LCD is what is received by the sensor, so-called live-view. With live-view, a lot of information that can be processed before the photo was taken, call for example the color information (for setting white balance), dark light information (for setting exposure) and contrast information (for setting auto focus). Modern DSLR cameras that already have a live-view feature brings two principles AF, good concept phase detect and contrast detect. Under normal conditions of speed and accuracy, DSLR cameras would use phase detect module as its default mode. However, when using live view with a stationary object (such as macro photo), we can use contrast detect mode by utilizing the magnification on the LCD screen, so we can be sure that the focus is taken just right.

The process begins when the auto focus shutter button is pressed halfway. When the camera immediately moves the focus element inside the lens back and forth to get the best contrast and give a confirmation in the form of sound 'beep' as a sign've managed to get the focus. This whole process takes between less than one second to several seconds. At DSLR, auto focus speed is much faster than other cameras for wearing special module principled phase detect AF. But whatever the method, there are some things that determines the speed cameras in finding focus, including:

  • - There is a good contrast to the object to be photographed. The lower the contrast of the object to be photographed, the camera is more difficult to get the right focus.
  • - The lighting conditions around the object to be quite good and not dark. Dark current is usually helps auto focus camera with AF assist beam firing light.
  • - The movement of the object to be photographed also affected, if the object moves too quickly it is difficult for the camera to lock focus.

In addition to pressing the shutter button halfway, the camera is a serious class as prosumer cameras and digital SLR cameras, there is the AE-L / AF-L that can be used to lock the focus. AE-L stands for Auto Exposure - Lock, while AF-L stands for Auto Focus - Lock. in settings further, this button can be customized into several functions, such as exposure and focus lock as well, or just lock the exposure, focus lock it, and lock the focus during this button is pressed (AF lock-hold). Choose which one best suits your wishes.

Initially known as auto focus, the camera simply choose the midpoint of the object image as a reference focus. This turned out to be difficult when the objects are not actually in the middle area of the photo. So it then made ​​the zone of focus or focal point spread in some areas of the photo. Generally, there are now at least three zones, namely focusing middle zone (main), left the zone and right zone. The more powerful the more the camera focal zones are available so that they can be more flexible and avoid mistakes locking focus. Special modules on DLSR camera AF, the AF point can be any cross-type sensors aka cross-type sensors. Such sensors are sensitive to differences in contrast both vertically and horizontally. The central AF point is certainly manifold cross type, while the other point is not necessarily. The more diversified cross-type AF points, and the more accurate the more expensive DSLR camera is in focus.

In addition to the focus zone, there are now more options on the camera auto focus mode, the servo AF mode option. Options are stationary or continuous, and adapted to the conditions of the object to be photographed. Stationary mode is chosen for stationary objects, and these tend to be the default mode on most cameras. Continuous mode will detect the movement of objects and try to continue to follow wherever the object moves. Currently DSLR camera was able to lock focus on a moving object left or right forward backward (3D tracking AF).
READ MORE

Understanding White Balance

Posted on with No comments


Caution:

All contents of this document are the property of Intellectual Property (IP) copyright of Focus archipelago, is prohibited to copy or move into the form, format or media whatsoever without the prior written consent (written consent) from Focus archipelago.

One of the important features of the digital camera is White Balance feature. This feature can be found on all digital cameras ranging from cameras on mobile phones, pocket cameras to digital SLR cameras. Why is quite important feature? The answer is none other than because this feature will determine the color accuracy of every photo we make. The resulting color digital camera can be affected by light sources used when we take pictures, whether sunlight, flash or other sources.

Light itself is actually a blend of various mixed color spectrum so that various light sources have different color character. In photography known various light sources to suit shooting conditions, such as sunlight, flash, light room (bulb or fluorescent) to the studio lights. Despite the fact that the light source has the same color visible to the human eye, is not the case with the camera. A light source such as incandescent bulbs will tend yellowish (or orange) while other light sources exist which tend to bluish .Warna of various light sources and is expressed in color temperature (degrees Kelvin) with a temperature range of between 1,000 K to 10,000 K. The lower a source color temperature, the color will be yellow (warm). The higher the temperature, the color will be blue (cool). Although the human eye color temperature difference is not a problem, but in digital photography this can interfere with the final color produced. For the human eye, a white object will appear white under different light sources. On camera, white object can appear yellowish when exposed to light with a low color temperature, or bluish when exposed to a light source with a high temperature. This is because the human eye has a color compensation capabilities while cameras only record what their color, the color temperature of the light source used could potentially shift the color produced by the camera so that a photograph can seem unnatural.

For that the digital camera is given a feature called White Balance (WB), which is a color compensation process performed on the camera to prevent the images whose color is not natural. WB process on the camera will adjust the color temperature emitted from the light source so that a white object will still look white, not too orange or blue.

Why should the white stuff? This is because the object putihlah easy to be a reference and be able to react to changes in the color of the light source. White color uncompromising, no young or old, gray white, no bluish white or yellowish white. The white color will be yellow when exposed to light yellow, and will be blue when exposed to blue light. So the white stuff could be appropriate benchmarks or not the camera WB settings. When the camera is set to WB for low color temperature light source, but given the higher color temperature of the white stuff last result will be bluish, otherwise if the camera is set to WB for high color temperature but given light source warnanyaa temperatures lower then the result is the white stuff This should be yellow (or orange).

The working principle White Balance on camera
Process White Balance on a digital camera can be done automatically by the camera, the term Auto White Balance (AWB), is available on all digital cameras from camera phones to high-end cameras. When the results of the AWB is not satisfactory, we can also choose from a variety of preset WB value available on the digital camera. In modern cameras even available option to perform the calibration manually.

Auto White Balance (AWB) is an internal process of the digital camera will automatically adjust to the color temperature of the light source. You could say in this process camera 'guess' the color temperature of the light source and compensate the color shift as necessary so that the resulting color becomes natural. AWB mode is in most cases unreliable for outdoor use day and night, with or without flash. How well this AWB could get a natural white color is determined by various factors such as the type of light source, the atmosphere around and the color of the object to be photographed. AWB will be safe when used during the day and use the flash, and AWB can deliver different performance when confronted with a light source that temperaturnnya low enough or high enough. When using the AWB does not give satisfactory results, use preset WB are already adapted to a wide range of color temperatures.

Here are some preset WB are common in digital cameras, sorted from lowest to highest temperature:
  • Tungsten or Incandescent (2500-3500K):
This preset is suitable to compensate for light sources such as incandescent light yellowish and is usually used for indoor shooting without flash. When the preset is applied to other light sources result will be very blue.
  • Fluorescent (4000-5000K):
Peset tailored to the color temperature of the fluorescent lamp. In the market generally available fluorescent light with two choices of warm white and cool daylight, where the two types of color temperature is different. Warm white has a low temperature approaching incandescent bulbs, are cool daylight has a color temperature closer to the sun in the daytime.
  • Daylight (5000 - 6500K):
Suitable for use when shooting outdoors in daylight with direct sunlight. 
  • Flash (5600K):
Adjusted preset color temperature of the camera's flash. This color temperature is considered the most natural, not bluish or yellowish.
  • Cloudy (6500 - 8000K):
These presets for use in the daytime but cloudy conditions (sometimes when using AWB results are somewhat bluish). These presets can produce a warmer color when compared with Daylight presets when used in daylight.
  • Shade (8000-10000K):
Preset to face the color temperature is very high, usually occurs while under the shadow of the sun or very cloudy conditions. Use preset Shade when the AWB you still have the photos are bluish. When the preset is applied to other light sources would be most yellowish.

By selecting a preset WB setting above, in principle, we are the ones who tell the camera will light sources that we use to take pictures. It is expected the camera will give the best results for WB existing light sources. Especially for the source of light, selection of preset WB presets do not have to always wear Daylight alone, because the color temperature of the sun is also dependent on the time, altitude and cloud. When using preset Daylight or use AWB still produce a bluish color (meaning presets that we choose are still too low) could try to raise the temperature by using a preset Cloudy Shade even. Conversely, if we photograph yellow (meaning presets that we choose too high), lower the temperature by using fluorescent light presets even incandescent lamps.

In particular camera facilities are also available to perform manually preset by pointing the camera to the object is white or gray to get the most natural colors. It is available as an accessory to a tool called gray card that is usually used for more precise WB settings. If color accuracy is a must, it is advisable to wear shooting RAW format so that the resulting color can be set accurately by computer.
READ MORE

Various options Metering Mode In Photography

Posted on with No comments

Caution:

All contents of this document are the property of Intellectual Property (IP) copyright of Focus archipelago, is prohibited to copy or move into the form, format or media whatsoever without the prior written consent (written consent) from Focus archipelago.

The term metering in photography play an important role in determining exposure, in this case the brightness of images produced. Metering in principle is the process of measuring light as a reference camera to determine the optimal components of exposure (shutter speed, aperture and ISO). Logic will attempt to keep the camera metering exposure fitting where the resulting image has a dark area (shadow), the central area / gray (midtone) and light areas (highlights) impartial. Unlike the human eye, the sensor in a digital camera has a range of limited sensitivity to light so that the camera is difficult to reproduce the dark light conditions that match the original condition. Metering performance of a camera will be very decisive to avoid the images are too bright (over-exposure) or too dark (under-exposure).

In DSLR cameras, there is a light meter module that has multiple sensors (segment / area) light sensitive. This module will receive the light entering through the lens duty to send information to a DSLR camera processor to illustrate the measured light conditions. On the other digital cameras, direct metering process carried out by analyzing the intensity of light on some parts of the sensor CCD / CMOS. Both processes metering with a DSLR camera or a regular digital camera, we can find there are several options available metering modes. Various metering mode will work when we use a digital camera with an automatic or semi-automatic exposure (Program / ​​Aperture Priority / Shutter Priority).
Choice of metering modes available on digital cameras including:

1. Multi segment / Evaluative / Matrix Metering

The first metering mode is commonly used mode in which the camera will determine the exposure by averaging measurements of light in all areas of the photo. In other words, the camera considers the measurement of light in all areas of the photograph has an equally important priority. In this mode the camera referring to the dark light of information received by all segments in light meter and then combining the results and averaged to determine the appropriate exposure. Each camera has a number of different segments and also averaging techniques are also different. The more segments are used for these measurements it will be more complete information received by the camera and the more accurate the results.

This mode is considered unreliable for most shooting situations (indoor and outdoor) and because the camera takes into account all segments of the photo field this mode is able to avoid the result that over-exposure photograph. But there are situations where this mode gives inaccurate results like landscape photography has a dominant element of the bright sky and high contrast.

2. Center-weighted Average Metering

In the second mode, the center-weight, the camera still rely on the measurement of many sensor area but a higher priority on field measurements middle of the photo (approximately 75% of the area of the photo) and not too into account the measurement of light outside the central area.

By using this metering mode, the central area generally be subject, can get a more precise exposure. This mode is suitable for facial portrait or other needs that are focused right exposure on the majority of the center of the photograph, while in the outer area may be a bit too bright or too dark.

3. Partial Metering

This metering mode as the name implies, only a partial measure of the central area of the sensor (approximately 15%) and will ignore the outside area, so it is suitable to cope with a brighter light from behind the object image (backlight).

When using the Multi Segment mode or Center-weight against the backlight still generate object silhouette, Partial metering mode can be used. However, because many areas outside that are not taken into account in the determination of exposure, outside the area can be very bright objects to experiencing clipping or blown highlights. This mode is suitable for facial portrait or other needs experienced backlight.

4. Spot Metering

In the spot metering mode named this camera measures only a small point of light on the plot (approximately 5% of the area of the photo) and will ignore 95% of the area besides the point earlier. This small point should be directed right at the object to be measured, if a little off the mark then the result will be different. Not all digital cameras offer this mode. This mode is useful for taking pictures in places where the lighting is very complex when not wearing the fashion spot will not obtain the appropriate exposure.

Usually the condition that forces us to use a spot meter is the current field image has contrast (light-dark difference) are very high, such as when shooting full moon. But if we are wrong in using this mode, the object to be photographed can be too bright or dark.

Keep in mind that the value of exposure there is no definitive standard. We only rely on eye to assess whether the resulting image already has the right exposure (sometimes rather dark picture or a little light does not mean the picture failed). If we think it turned exposure image produced by the camera is not in accordance with our wishes, can be overcome with exposure compensation (Ev) in the negative direction (darker) or positive (lighter). Can also use the help button locks exposure (exposure lock / AE-L), or the difficulty in obtaining a correct exposure can also be overcome with the help of reflectors or even flash.
READ MORE

Understanding Components Exposure in Photography

Posted on with No comments

Caution:

All contents of this document are the property of Intellectual Property (IP) copyright of Focus archipelago, is prohibited to copy or move into the form, format or media whatsoever without the prior written consent (written consent) from Focus archipelago.

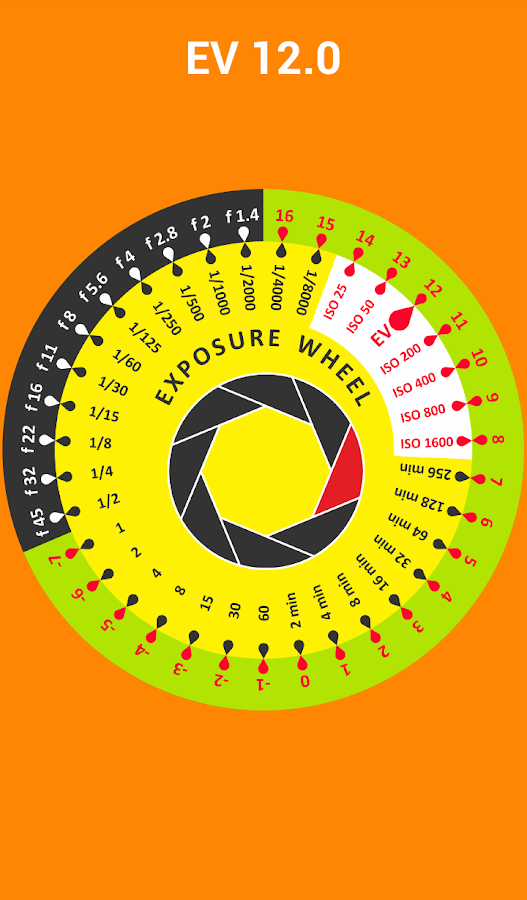
Term exposure in photography can not be separated from the main factor in the photography itself is light (light). In theory exposure photography is defined as the amount of light that is allowed on the medium of film or sensor. The more light on the film or sensor then the resulting image will be brighter, and vice versa. When a photograph becomes too bright, the image is called over-exposure, are photos that are too dark so-called under-exposure. To regulate the entry of light into the camera, there are two main components, namely the shutter and aperture.

Shutter

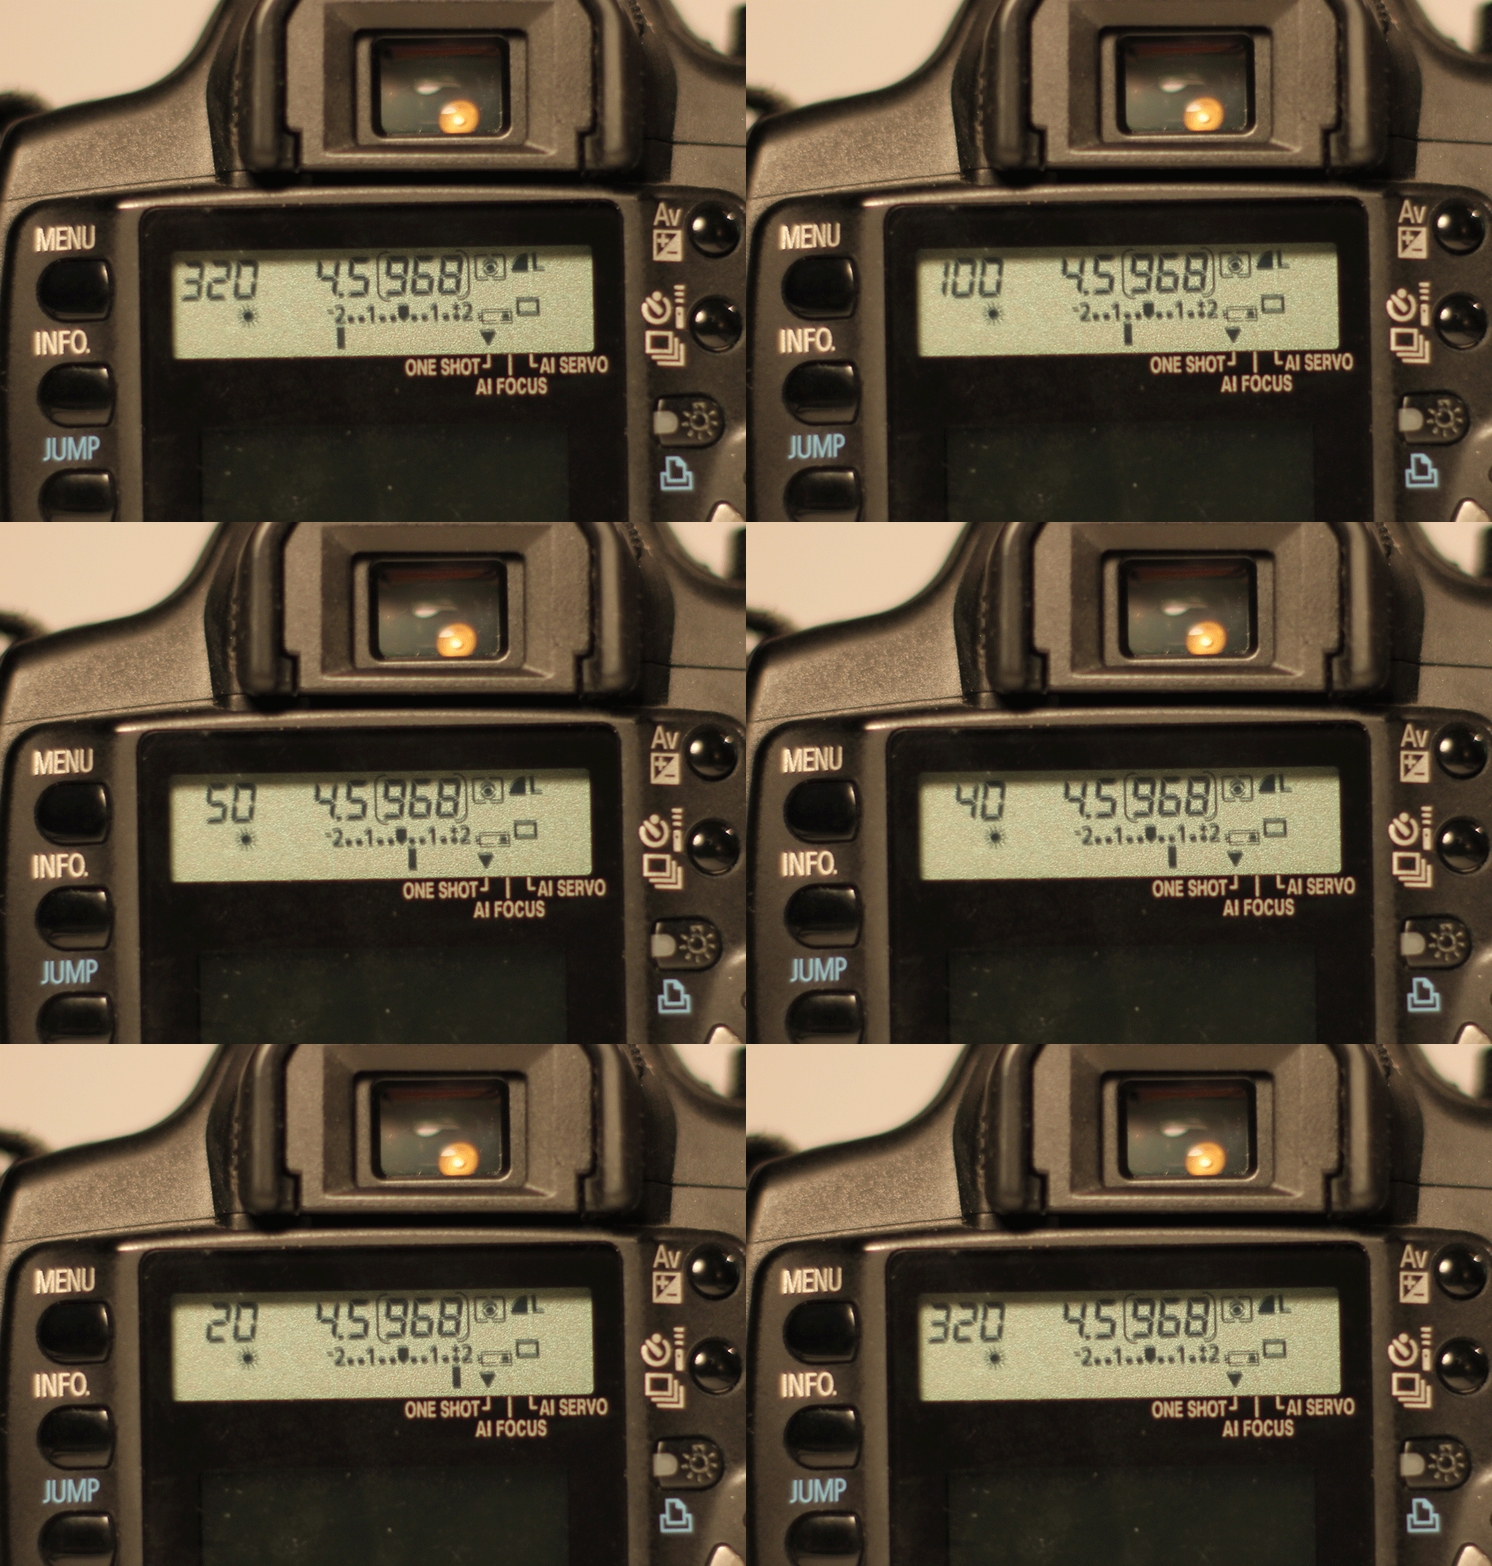
Shutter function as a component of determining how much light is allowed to hit the sensor. At the moment the shutter button is pressed, the shutter will be open for a while and then close again. The time required for the shutter is open until closing hereinafter referred to as the shutter speed (shutter speed). The shutter speed can be set on the camera, ranging from the highest to the lowest value (this value varies for each type of camera). The faster the shutter opened the less light that can be included, otherwise the longer the shutter is open, the more light to enter the camera. Available shutter speed value (in seconds) is in the form of raw multiples rows as follows:

1 - 1/2 - 1/4 - 1/8 - 1/15 - 1/30 - 1/60 - 1/125 - 1/250 - 1/500 - 1/1000

From the series above we can see that multiples of this value is a multiple of two. So 1/30 seconds is two times slower than 1/60 sec, so if the value of the shutter on the camera was changed from 1/60 sec to 1/30 sec means the amount of light that enters the camera plus two times more than before. Likewise 1/500 sec was two times faster than 1/250 sec, so if the value changed from 1/250 sec shutter becomes 1/500 sec it means reduced amount of light entering from the previous half.

Besides useful to set the brightness of a photo, be creative with the next shutter speed can produce images of high-speed and slow-speed photograph which both have their own uniqueness and artistic value. Just use the shutter speed is too slow required a tripod to prevent blurry photos due to hand shake when shooting.

Aperture

Second exposure control is the aperture. Aperture is a part of the lens in a hole that can grow and shrink (commonly called the aperture or diaphragm), where the greater the opening then the more light that can enter, otherwise the smaller the opening, the light that can enter the less. The size of the aperture This is expressed in f-number, where the f-number large and small states bukaaan large f-number states small openings. F-number standard for modern lens is as follows (in order of largest to smallest aperture):

f / 1.4 - f / 2 - f / 2.8 - f / 4 - f / 5.6 - f / 8 - f / 11 - f / 16 - f / 22

The concept of light settings by changing the lens aperture is a bit more complicated to understand. First keep in mind, the above sequence is a multiple of the stop or the Exposure Value (EV). If we increase the aperture by one stop (eg from f / 11 to f / 8) means that we increase the amount of light that enters the camera doubled, while if we turn down the lens aperture by one stop (eg from f / 2.8 to f / 4) means that we reduce the amount of light coming into the camera as much as half.

Second, for a more precise setting, the diaphragm in a modern lens capable set in smaller steps, generally a multiple of 1/2 and 1/3 stop. For example, between f / 2.8 to f / 8 there are some f-number multiple of 1/3 with a stop (marked in blue), namely:

f / 2.8 - f / 3.2 - f / 3.5 - f / 4 - f / 4.5 - f / 5 - f / 5.6 - f / 6.3 - f / 7.1 - f / 8

From the sequence above, it appears that turns between f / 2.8 and f / 4 is still available two f-number, which represented 1/3 EV is f / 3.2 and f / 3.5. Thus we have the flexibility to control the opening of the finer and more precise.

In addition to a control brightness of a photo, be creative with the lens aperture wide variation also determines the depth image or depth-of-field. Photos taken using a large aperture will give background blur (out of focus), while a small aperture will give a sharp background.

ISO

In addition to the above two components, there is one more factor that played a role in determining exposure, ie the sensitivity of the film or sensor is commonly referred to as ASA or ISO. The sensitivity level is expressed in numbers and also made ​​following the series multiples of two (one stop), namely:

ISO 100 - 200-400 - 800-1600 - 3200-6400

ISO 100 to ISO low (as well as a default ISO value) and the value of the sensitivity of the sensor is located at the lowest value. To make the sensor more sensitive to light, ISO value can be raised to a higher ISO values. When the ISO is increased, the sensor output voltage signal is made ​​larger so that the camera becomes more sensitive to light. In theory, if the ISO is increased as much as one-stop means the sensor sensitivity is increased by two-fold. In everyday use, the ISO is used can use the default values ​​in the low ISO (eg ISO 100). Higher ISO takes on two conditions, first during low-light or use in low light. Second, high ISO is required when we need a faster shutter speed. For example when using ISO 100 value obtained shutter speed is 1/500 seconds, then if the ISO is increased one stop to ISO 200 that occurs is the shutter speed is also up one stop to 1/1000 sec (assuming the lens aperture is not changed). But keep in mind that high ISO also carries consequences of noise in the picture. For film cameras, ASA value determined on film that we use so as to change the value of ASA we have to replace the film used.

Reciprocity

Set the exposure can be done manually or automatically (determined by the camera). In most compact cameras, we can not determine the value of the shutter speed or aperture. There was even a camera that does not allow us to set the ISO value, aka the camera automatically determines the ISO of each photo that we took. However, when the available camera manual exposure control, we can create adjust the exposure for each photo will take. Setting the shutter speed, aperture and ISO value right will synergize to gain exposure we want.

In practice in the field, we can produce multiple images with the same exposure generated when wearing a pair of variation shutter and aperture values ​​are varied. For example a photograph taken with a shutter speed of 1/125 sec and aperture f / 5.6 and we want to produce another photo exposure to the same but different settings. So we can do is:

Lowering the shutter speed becomes 1/60 seconds (one stop slower) and shrink the aperture to f / 8 (one stop smaller).
Raise the shutter speed becomes 1/250 sec (one stop faster) and enlarge the aperture to f / 4 (one stop larger).

It appears that the first option we see by slowing down the shutter speed one stop means we make so much brighter picture, then to get the right exposure, we have to turn down the lens aperture to compensate.

While the second option is the opposite. By increasing the shutter speed means that we make the picture became darker and to get the right exposure, should be offset by increasing the aperture.

So when we expose the sensor for a longer time, then on the other side we have to turn down the lens aperture to reduce the incoming light so that it can obtain the same exposure value. In short, if you are a plus, the other must be reduced, so that the end result remains the same akaan. This is called the principle of reciprocity in the theory of photography. (EM)
READ MORE

Top 10 Most Famous Portrait Photographers In The World

Posted on with No comments

Travel portrait photography is not just about making a portrait, it is about capturing a moment, an emotion. And for this to happen, one must interact, love people and know how to catch the right moment.

Here is a top-10 list of photographers that are famous for their portraits of people from around the world.

1. Steve McCurry
 
Steve McCurry has been one of the most iconic voices in contemporary photography for more than thirty years, with scores of magazine and book covers, over a dozen books, and countless exhibitions around the world to his name.

Born in a suburb of Philadelphia, Pennsylvania; McCurry studied film at Pennsylvania State University, before going on to work for a local newspaper. After several years of freelance work, McCurry made his first of what would become many trips to India. Traveling with little more than a bag of clothes and another of film, he made his way across the subcontinent, exploring the country with his camera.

Steve McCurry is famous for his photo ‘Afghan girl,’ taken in a refugee camp in Peshawar, Pakistan. This photo was named the most recognized photo of National Geographic. His other less famous photos are really worth a look!

Source: stevemccurry.com

2. Lee Jeffries
 
Lee Jeffries lives in Manchester in the United Kingdom. Close to the professional football circle, this artist starts to photograph sporting events. A chance meeting with a young homeless girl in the streets of London changes his artistic approach forever. Lee Jeffries recalls that, initially, he had stolen a photo from this young homeless girl huddled in a sleeping bag. The photographer knew that the young girl had noticed him but his first reaction was to leave. He says that something made him stay and go and discuss with the homeless girl. His perception about the homeless completely changes. They become the subject of his art. The models in his photographs are homeless people that he has met in Europe and in the United States: «Situations arose, and I made an effort to learn to get to know each of the subjects before asking their permission to do their portrait.» From then onwards, his photographs portray his convictions and his compassion to the world.

His collection of black and white portraits of homeless people is unique and stunning. He depicts a glimpse of hope in the eyes of his subjects. Simply touching…

Source: leejeffries.500px.com

3. Jimmy Nelsson

Jimmy Nelsson is well-known for his portraits of tribal and indigenous people taken in more than 16 countries. His photos will live to tell the tale. Nelsson’s book is now a collector’s item.

Source: beforethey.com

4. Rehahn

Rehahn is specially focused on photographing Vietnam, Rajasthan and Cuba. He is famous for catching the soul of his subjects. Rehahn is undoubtedly one of the best portrait photographers in the world.

Source: rehahnphotographer.com

5. Eric Lafforgue
Famous for his photos taken in North Korea, Eric Lafforgue has a story for each person he has photographed. From the tribes of Namibia to the Yezedis of Kurdistan, his tales are fascinating and his photos depict some real emotions.

Source: ericlafforgue.com

6. Manny Librodo
The ‘Photoshop wizard’ Manny Librodo’s photos don’t just tell a story, they are pure works of art.

Source: pbase.com

7. Lisa Kristine
Lisa Kristine is a humanitarian photographer who documents indigenous cultures in more than 100 countries and portrays the human dignity in all of us. She is famous for her role in exposing modern day slavery.

Source: lisakristine.com

8. David Lazar
These are breath-taking photos taken in Brazil, Bangladesh and Kenya. David Lazar is always in the pursuit of moments in life.

Source: davidlazarphoto.com

9. Joel Santos

The meaningful look of these portraits says it all. Joel Santos demonstrates the feeling of his subjects.

Source: joelsantos.net

10. Phil Borges
His photos of Tibetan refugees are unique and the hardship is felt throughout his work.

Source: philborges.com
READ MORE

National Geographic Experts : Expedition Team

Posted on with No comments


A National Geographic expert will accompany each departure to share insights and a rare behind-the-scenes perspective. Listed below are some of the experts -


Kent Kobersteen
Photographer

Kent Kobersteen joined the National Geographic magazine staff as a picture editor and became. Director of Photography and Senior Editor, positions which he held for seven years. He currently, conducts photographic workshops and lectures internationally on the philosophy, ethics, and business of photojournalism. Before coming to National Geographic, Kent spent 18 years at the Minneapolis Tribune, where he served for 16 years as a staff photographer and two years as editor of the Tribune’s Sunday magazine. His photographic work has taken him to more than 85 countries. Kent has been a featured expert on National Geographic expeditions on the South Atlantic and Antarctica, as well as on the Society’s Around the World by Private Jet expedition. During Kent's tenure at the National Geographic the magazine was a five-time recipient of the prestigious National Magazine Award for photography.


Edward J. Larson
Author

Pulitzer Prize-winning author Edward Larson explored Antarctica extensively for his latest book, An Empire of Ice: Scott, Shackleton, and the Heroic Age of Antarctic Science. He has held the Fulbright Program's John Adams Chair in American Studies and participated in the National Science Foundation's Antarctica Artists and Writers Program. Edward has written nearly a dozen books, including Summer for the Gods, which won a Pulitzer Prize in 1998.


Peter Hillary
Author, Adventurer

When Peter Hillary first climbed Mount Everest in 1990, he and his father, Sir Edmund Hillary—who made the first ascent of Mount Everest in 1953—became the first father and son to reach the summit of the world's highest mountain. Among Peter's 40 mountaineering expeditions, he participated in a 2002 National Geographic-sponsored ascent and film on Mount Everest. He is the author of six books on mountaineering and does charitable work to assist the local people of the Mount Everest region in Nepal.


Susan Seubert
Photographer

Award-winning travel and editorial photographer Susan Seubert has photographed more than 20 feature stories for National Geographic Traveler since joining the magazine as a contributor in 2004. Her subjects range from Canada to the Caribbean and Texas to Thailand. Her work has been recognized by the department of journalism at Columbia University with an Alfred Eisenstadt Award and most recently by the North American Travel Journalists Association for excellence in photography. In addition to being widely published and exhibited, she also lectures regularly about her work at such institutions as Harvard University and the Portland Art Museum. Based in Portland, Oregon and Maui, Hawaii, Susan travels throughout the world shooting a variety of subjects and specializes in capturing a sense of place through her wide-ranging imagery. Susan's in-depth knowledge of digital technologies and her multimedia skills keep her at the cutting edge of visual storytelling. Born and raised in Indiana, she earned her Bachelor's Degree in Fine Arts from the Pacific Northwest College of Art, and she hasn't set down her camera since. When not on assignment, she divides her time between Portland, Oregon and Maui.
 

Jeff Mauritzen
Naturalist, Photographer

National Geographic photographer and naturalist Jeff Mauritzen traveled to Africa, South America, and the Pacific on assignment photographing wildlife for the Society's most recently published Animal Encyclopedia. Jeff is also a seasoned and popular photography expert, guiding and lecturing on natural history-focused trips for National Geographic Expeditions. His adventures have immersed him in vivid landscapes both above and below the water in five continents and more than 50 countries around the world. Whether capturing 360-degree panoramas of wildlife along an African savanna or photographing sharks in the Pacific depths, Jeff’s work expresses an unwavering passion, respect, curiosity, and awe for the natural world. An avid traveler and explorer, Jeff has lived in Venezuela and Ireland, as well as at sea aboard seven different ships. His photography is represented by National Geographic Creative and has appeared in National Geographic books and numerous other publications, as well as on the Society's website.


Sisse Brimberg and Cotton Coulson
Photographer

Photographers Sisse Brimberg and Cotton Coulson have collectively photographed more than 60 stories for National Geographic and National Geographic Traveler magazines. They have spent most of their careers working in Europe, shooting stories from the Arctic and Scandinavia to Italy and France. Both Sisse and Cotton have been awarded numerous prizes by Pictures of the Year International, the National Press Photographers Association, White House Press Photographers Association, and Communication Arts. Today they are based in Glasgow, Scotland, yet spend most of the year on the road producing magazine stories and videos for the Geographic.
READ MORE

This is What Happens When a Football Player Lands on a $10,499 Canon Lens

Posted on with No comments


One of the stranger stories that occurred in the world of photography this past weekend was when Oklahoma football player Sterling Shepard crash landed on a Canon telephoto lens, snapping it into two pieces.

Now that the dust is settled, the photographer has come forward with his account of the incident and an apology to the player.

It turns out the man behind the camera was Tulsa World photojournalist Mike Simons. In an article published today, Simons writes that he “felt horrible” that his camera gear caused Shepard pain. He also addresses comments about where the gear was being kept at the time:

Some comments have been made about camera gear lying by my side. I have always felt that flat on the ground is the safest place for gear that isn’t being used at that particular moment. It is where most photographers keep their gear. It allows me to move out of a player’s way quickly. And there are no monopods (the metal poles on the bottom of our cameras) sticking up needlessly. It has worked perfectly for 26 years. On Saturday, while lined up with dozens of other photographers in the designated photo area, it didn’t. The carnage from my end of this incident was that a Canon 400mm F 2.8 lens was broken in half. The lens sells for $10,499. It’s a lot of money, but nothing in comparison to a player’s safety.
One of the critics of Simons was Oklahoma coach Bob Stoops, who argued after the game that photographers shouldn’t be allowed to have as much gear on the sidelines:

Here are a couple shots Simons managed to capture as Shepard hurtled toward him:


READ MORE

Tips - Create Dreamy Portrait Photos With a Tilt-Shift Lens

Posted on with No comments

Photographer Heidi Browne shares her tilt-shift technique for creating surreal portraits


When we think of a "portrait lens," it's usually something like an 85mm F/1.4 or the 135mm F/2. But the fact is, you can shoot portraits with any lens, and opening up your options to include tilt-shift can make for some truly unique photographic opportunities. Heidi Browne of Forged in the North Photography has honed that skill and offers some helpful tips for getting started with tilting and shifting.

What is a tilt-shift lens?

Tilt-shift lenses allow you to manipulate the optics relative to the film or digital sensor. You can read our introduction to tilt-shift lenses here for a basic primer.

Most commonly for portraits we us the tilt movement, which skews the plane of focus. So, rather than having a flat wall of focus parallel to your sensor, you can now have two subjects in focus, even if they're at different distances from the lens.

You can specify how wide the band of focus in the photo is by how much you tilt. A big tilt will appear to have a narrower band of focus running across the frame and a small tilt will give you the opposite. It provides a unique and dream like quality to the image by the way it captures focus and treats light.

When to choose a tilt-shift over a standard lens

As a photographer, lens selection is a big decision. Each lens has different properties and nuances, especially when you add the variables involved with tilt-shift.

A great application for a tilt-shift lens is a group shot where the subjects are closer and further away from the lens but all of their faces are at relatively the same height in the frame. It can be useful as well when trying to capture your subject while they are walking toward you or away from you. On a standard lens, a subject moving toward or away will fall out of focus immediately. With a tilt-shift lens, you can extend that plane of focus behind and in front of your subject so they stay in focus while changing distances from your lens.

One of my favorite reasons for selecting a tilt-shift lens vs. a standard lens is that you can create bokeh in wide, landscape type shots that you wouldn't get otherwise.

Tilt-shift lenses can be expensive, so definitely consider renting one to work with before making the leap into purchasing one.

Choosing the right tilt-shift lens for the job

For the most part, the conventional lens-choosing wisdom still applies. If you have a larger scene, like a landscape or a cityscape, you'll want to choose a wider lens. It helps to capture the environment surrounding your subjects. If you want a tighter portrait then a longer lens will be a better choice.

Lately, I've been experimenting with using a wider focal length and getting very close the subject. The image feels intimate with lots of separation between the subject and background. It makes for a more unique portrait.


Learn your lens
Getting to know the characteristics of your lenses is important, especially since tilt-shift glass can behave so differently than a normal options. For instance, our Rokinon 24mm TS has a beautiful, cinematic blue flare when the sun enters the side of the lens. The Canon 45mm TS will produce a rainbow flare in certain lighting conditions. The more you know the way your lens manipulates light the better you will be at selecting the right lens at the right time.

For example, when I am shooting backlit subjects with the Canon 45mm TS, the images are low-contrast and buttery. So when I want a dreamy, washed-out look, that's the lens I go for.

Pick a location that maximizes the effect
 
Usually you want to shoot with a background that has a lot of texture. For instance, tree canopies produce really beautiful bokeh when you tilt the lens. Shooting with a lot of negative space as the background, like a blue sky or fully overcast sky, won't utilize the qualities of the tilt because you won't see the focus plane being manipulated.

Focusing

Once you have your lens selected, figure out how wide of a plane of focus you would like. I tend to tilt my 45mm lens up about half way to its maximum tilted position. When you tilt up, you will not be able to focus toward the top edge of the frame. And when you tilt down, you will not be able to focus toward the bottom edge. Knowing your focus limitations with your specific tilt-shift lens just takes practice.

I shoot on Canon 5D III bodies and use the AF indicator light in the viewfinder to know that my focus plane is exactly where I want it to be. Shooting in live view mode can also be helpful since you can zoom in and check focus more precisely than just looking through the viewfinder.

It is also not a bad idea to do some focus bracketing. When you think your subject is in focus, try grabbing a couple additional shots with the focus a little lower and a little higher from where you think it should be. You'd be surprised as to how often you accidentally miss focus, and you'll thank yourself later for doing it.

Normally you shoot with your focal plane horizontal in the frame (the lens is tilted up or down). However, you can opt to shoot with the focal plane being vertical (by swinging left or right). It provides a very different look where the image to the left and right of the subject is out of focus.

Metering

I use the camera's meter for the first shot to get it as close as possible and then review the histogram on that image. Because of the tilting and the way the lenses deal with direct light it's a bit of a trial and error. It can help to work in manual and don't be surprised if you get some truly wacky readings that can be off by two or three full stops.

Processing

When I shoot with certain tilt-shift lenses into the sun, I find that the image is too washed out because of the flare, so I treat those images with a bit more contrast than others. Otherwise, my processing for tilt-shift photos are the same for any other shots.

Things to Avoid

When shooting a group of subjects where you really want to nail the focus, avoid making the focus plane too narrow, always err on the side of a wider plane.

Another thing to be mindful of, is the lens flare washing out the image too much. Like with any new gear, make sure you have a grasp on it before bringing it into any kind of commissioned job scenario.

Don't overdo it

Like any specialty lens, you don't want to saturate a series of photos with tilt-shift. It just depends on the overall look you're going for. Some clients love the softer, more ethereal look of the tilt-shift, while others may want a sharper finished product. I always shoot with two bodies. One always has a tilt-shift on it and the other one always has a standard prime. This way when I am shooting a particular scene, it's simple to shoot it on both and decide later what worked best.


Tricks and bonuses

A trick a lot of photographers like to use the tilt-shift for is to simulate a miniature scene of a city or landscape from above. This is because it gives the appearance of a shallow depth of field like something that you shoot close up, vs. a city skyline that would not have a shallow depth of field on a standard lens. If you can get up really high during a wedding ceremony or even during a portrait session, it can be a very powerful effect.

Check out Heidi's official website here: Forged in the North Photography

READ MORE

Latest

Blog Archive

Hit Me